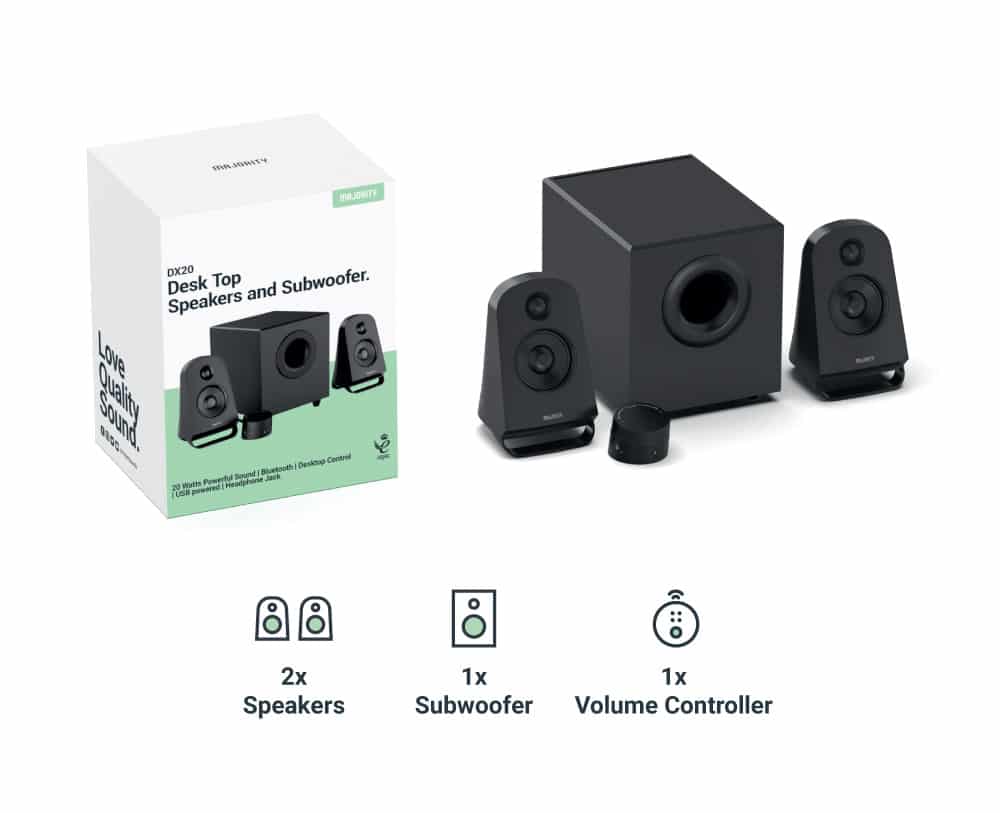
Back View
- BASS Volume
- TREBLE Volume
- Power/Mode
- Prev
- L&R Speaker
- Main Volume
- Next
- Play/Pause
- USB
- SD Card

Desktop Control Buttons
- Headphone Jack
- Mode & Main Volume

| Button | Operate | Action | Function |
| Treble | Rotate | Clockwise Rotation | Increase the treble volume |
| Anti-clockwise Rotation | Reduce the treble volume | ||
| Bass | Rotate | Clockwise Rotation | Increase the bass volume |
| Anti-clockwise Rotation | Reduce the bass volume | ||
| Volume | Rotate | Clockwise Rotation | Increase the volume |
| Anti-clockwise Rotation | Reduce the bass volume |


Mode Indicator Lights

Connecting to the Mains Supply
- Ensure that the power supply voltage is within the range of 100V-240V
- This unit is designed to use a power adapter or USB port.
- Unwind the mains cable to its full length.
- Connect the mains plug to a mains socket.
- Make sure the mains plug is fully inserted into the mains socket.
- Connect the adapter to the unit via the DC input socket. (DC-5V-IN).

Ensure all audio connections of the unit are connected before connecting to the mains power socket. Unplug the power cord from the outlet when the unit is not in use for an extended period of time.
Using the USB Input
- Insert your USB drive/stick into the USB port that can be found on the back of the subwoofer
- Press POWER/MODE button on the subwoofer to change the DX20 into USB mode. The mode LED light indicator will turn Purple .
- Once all set-up, music from USB drive/stick will automatically start to play.

Using the TF Input
- Insert your TF Card into the SD Card port on the subwoofer.
- Press the POWER/ MODE button on the subwoofer to change the mode for SD card. The mode LED light indicator will turn Purple.
- Once all set-up, music from SD/TF card will automatically start to play.

Using the MP3 Connection (AUX-In)
- Plug the other end of the AUX cable into audio output/headphone jack on your MP3 player or other audio device.
2. Press the POWER/MODE button to change the mode into Line-in. The mode LED light indicator will turn Purple.
3. Once all set-up, you can play audio from your MP3 player or other audio device.

Bluetooth Operation
Pairing a Bluetooth Device for the First Time
- Select and press 32:(502′( button on the Subwoofer until Bluetooth mode is selected, indicated by a flashing blue light. Using the native controls on your Bluetooth device, select the “Majority DX20” when prompted to choose a Bluetooth device. When successfully paired and connected, a beep will issue from the unit and the Pairing Indicator will display a solid blue light. After initial pairing, the unit will stay paired unless unpaired manually by the user, or until the
device is reset. - To unpair, hold down the PAIR button for 3 seconds. You can now pair the device with another Bluetooth device.
- The power cable into the mains socket. In case your device will disconnect from DX20, or if you are unable to connect please start over again following the paring steps again.
Troubleshooting
If you encounter an issue with your soundbar, please refer to the following checklist.
